GEOMKIT® – The Tactile Geometry Kit
Geometry is one of the most eyes-intensive branch of Maths. Incidentally, it is also at the core of many advanced Maths concepts like Trigonometry, Coordinate Geometry, Calculus, Mensuration, Statics and Dynamics. But, due to the visual nature of the curriculum, coupled with unavailability of technology solutions, large number of students with Visual Disabilities are forced to drop Maths in their higher secondary.
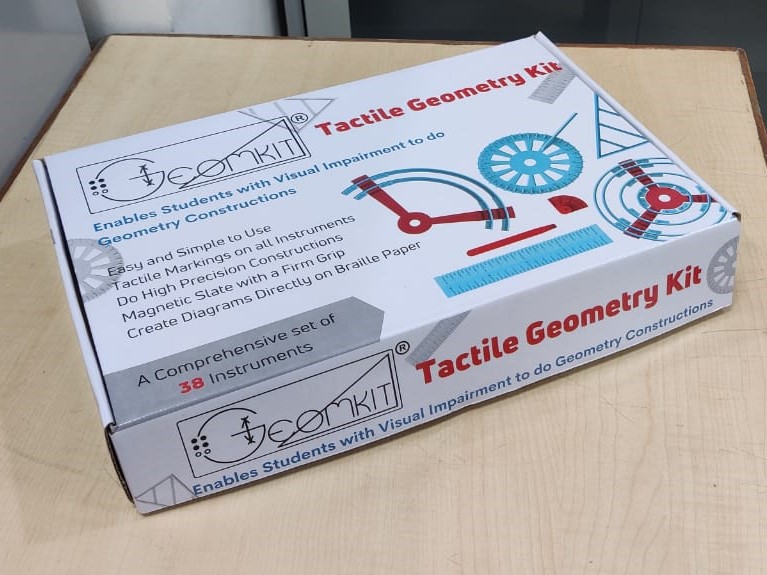
Persons with Visual Disabilities use touch sensation to visualize a drawing – therefore, what they need is a Geometry Kit, using which they can construct embossed geometrical patterns. GEOMKIT® (Patented) is designed to fulfil that need. In fact, all the geometrical constructions as per NCERT Class VI – X syllabus have been successfully made using GEOMKIT.
GEOMKIT® has been used to teach Geometry at multiple schools for visual disabilities across India and has received great reviews. GEOMKIT® is also awarded the prestigious NCPEDP-Mphasis Universal Design Award 2020 for its innovative design.
Incidentally, GEOMKIT® is proving to be a gamechanger for students with visual disabilities in learning geometry. It is heartening that SAKSHAM TRUST (an India based NGO headed by Mr. Dipendra Manocha, a visually challenged himself) and RAISED LINES FOUNDATION (a section-8 not-for-profit company incubated at INDIAN INSTITUTE OF TECHNOLOGY, DELHI) have come together to ensure GEOMKIT reaches the Target Beneficiaries.
Moreover, in order to promote this cause, SAKSHAM has launched a GEOMKIT SPONSORSHIP PROGRAM under “SAKSHAM GEOMKIT Project”, which has already received Sponsorship of over 1200 GEOMKITs.
You may find more details about it here
GEOMKIT is commercially available presently at saktek.in platform.

Present Geometry Kits and their Limitations
GEOMKIT® – Features and Components
Instructions and Demo (YouTube) and the User Guide
Present Geometry Kits and their Limitations
Persons with visual disabilities use touch sensation to visualize a drawing. Hence, for them, the drawings must be tactile – either embossed (e.g., line drawings) or textured (e.g., area drawings). Since, geometrical figures are predominantly line drawings, the need is to have a geometry set such that they can construct embossed geometrical figures using it.
Indirect tactile geometry set
The traditional ‘Indirect tactile geometry set’ for the students with visual disabilities, unfortunately, does the opposite. This set includes a rubber-surfaced tactile clipboard, and a wheel marker that makes depressions on a braille paper placed on the tactile clipboard. The depressions are read by the student by reversing the braille paper and feeling the embossed impression (corresponding to the depression made on front side of the paper) on the reverse side of the braille paper (This process is called ‘Indirect Tactile drawing’).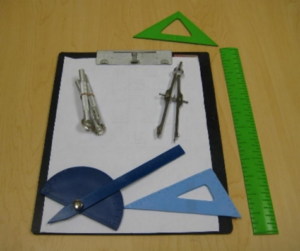
The traditional Tactile Geometry Set also includes a Ruler, a Protractor, and a pair of Set squares with tactile marking on them, as well as a Compass with wheel marker attached to it.
While this set may provide students with visual disabilities a basic concept of line, angle, and circle, it is evident that this ‘Indirect Tactile drawing’ approach is incapable of drawing any meaningful geometrical figures that are required as part of learning geometry. For example, a student with visual disabilities would find it difficult to draw even a simple geometric construction such as “mark two points ‘P’ and ‘Q’, and draw a line joining them” using this traditional tactile geometry set. Consider, the blind student marks two points ‘P’ and ‘Q’ in the form of depressions on the braille paper. But the student can locate the points ‘P’ and ‘Q’ only on the reverse side of the braille paper. Hence it would be rather impossible to draw the line joining the points ‘P’ and ‘Q’ on the front side of the paper. Consider now, the student draws a line joining points ‘P’ and ‘Q’ after feeling the points ‘P’ and ‘Q’ on the reverse side of the braille paper using the wheel marker. But the line joining the points ‘P’ and ‘Q’ is now felt on the front side of the braille paper. Thus, we have points ‘P’ and ‘Q’ on reverse side of paper, while the line joining them on the front side.
This limitation has blocked the students with visual disabilities from drawing any meaningful geometrical constructions using the ‘Indirect tactile geometry set’.
Tactile drawing board
A ‘Tactile drawing board’, however, uses ‘Direct tactile drawing’ approach to draw, and hence is generally used as geometry set too. This board uses a special plastic film sheet placed over rubber-surfaced tactile clipboard and uses a special stylus to create tactile impressions on it.
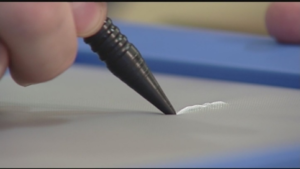


Incidentally, while one can draw a line, a circle, and an angle individually using this board, but drawing a full meaningful geometrical construction – comprising of multiple lines, angles, circles, and arcs as part of it – is not an easy task using it.
GEOMKIT® – Features and Components
Persons with visual disabilities use touch sensation to  visualize a drawing – hence, the students with visual disabilities need a Geometry Kit using which they can construct embossed geometrical patterns. GEOMKIT® (Patented) is designed aimed to fulfil that need.
In fact, all the Geometrical Constructions as per India NCERT Class VI – X syllabus are completed successfully using GEOMKIT.
Below are a couple of complex geometrical constructions that are made using GEOMKIT.

The Approach
In principle, to draw geometrical shapes and geometrical constructions, we need tools to draw the following:
- Point
- Line and Line Segment
- Circle and Arc
- Angle between two lines
GEOMKIT provides all that and many more. It includes the following items in the kit:
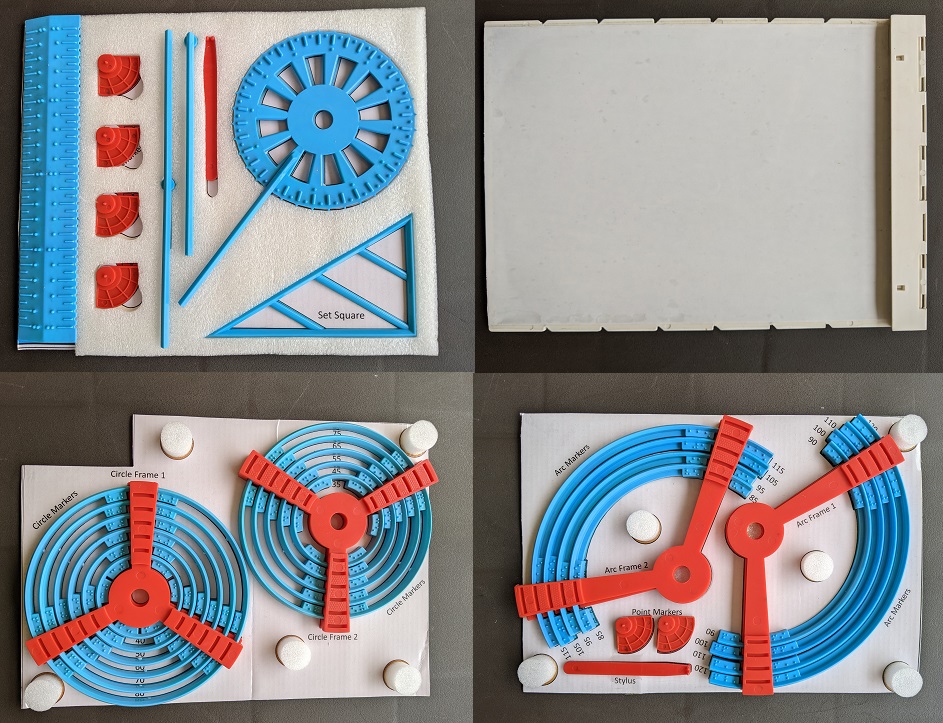
The Components of GEOMKIT

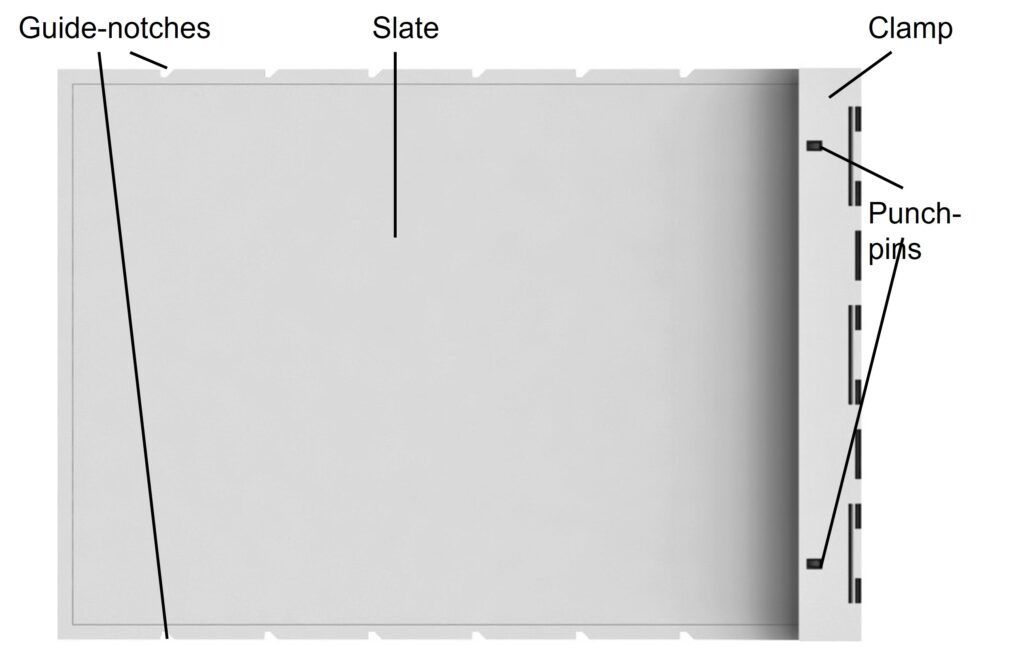
- Slate
- The slate has a metallic top – providing “Design Layout Plane” for the geometrical construction.
- It has a tier’ed clamp to secure the paper at a height, thus providing an “Embossed Drawing Plane” for the geometrical construction.
- The clamp has 2 punch pins and 2 magnetic engagements for soft yet firm grip.
- Slate has Guide-notches on both side edges to align Ruler horizontally if so desired.
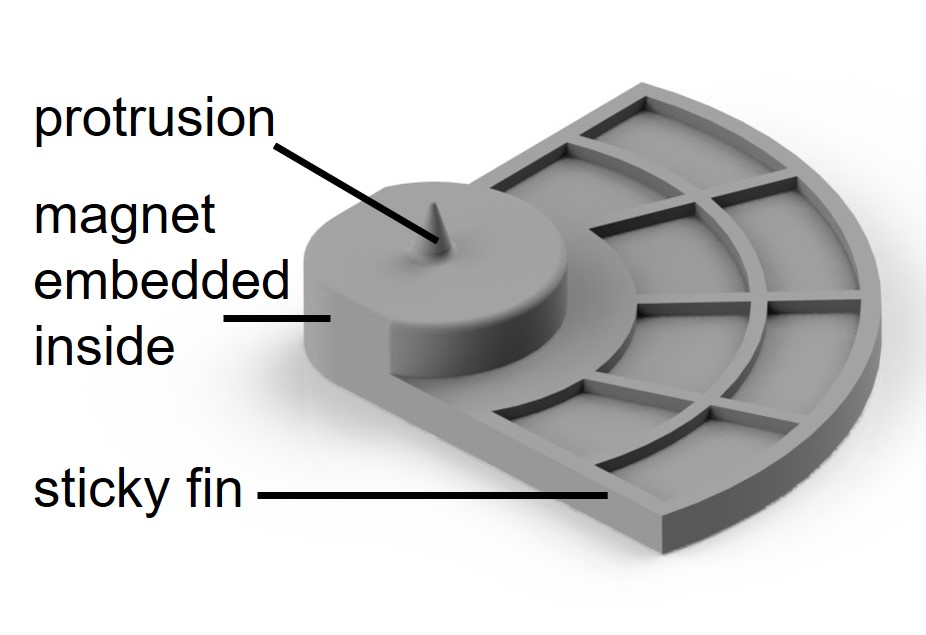
- Point Markers
- Point Marker has a magnet with metallic protrusion for creating a point mark on paper.
- It has a magnetic fin for added grip and for controlling Point Marker’s movement on the ‘Design Layout Plane’ by hand.
 Line Markers
- Line Marker has groove at the bottom to grip and slide over the Point Marker.
- It has a raised pattern on the top to create embossed impression on paper when the Stylus traces over it.
- Two Line Markers are included of lengths 15 cm (suitable for drawing Angles using Protractor) and 21 cm (suitable for drawing Line segments) respectively.
- Each Line Marker also has a magnetic ‘Support Grip’ at the bottom to provide better grip on the slate. While 15 cm Line Marker has it placed on the edge, the 21 cm Line Marker has it placed in the center to avoid sagging.
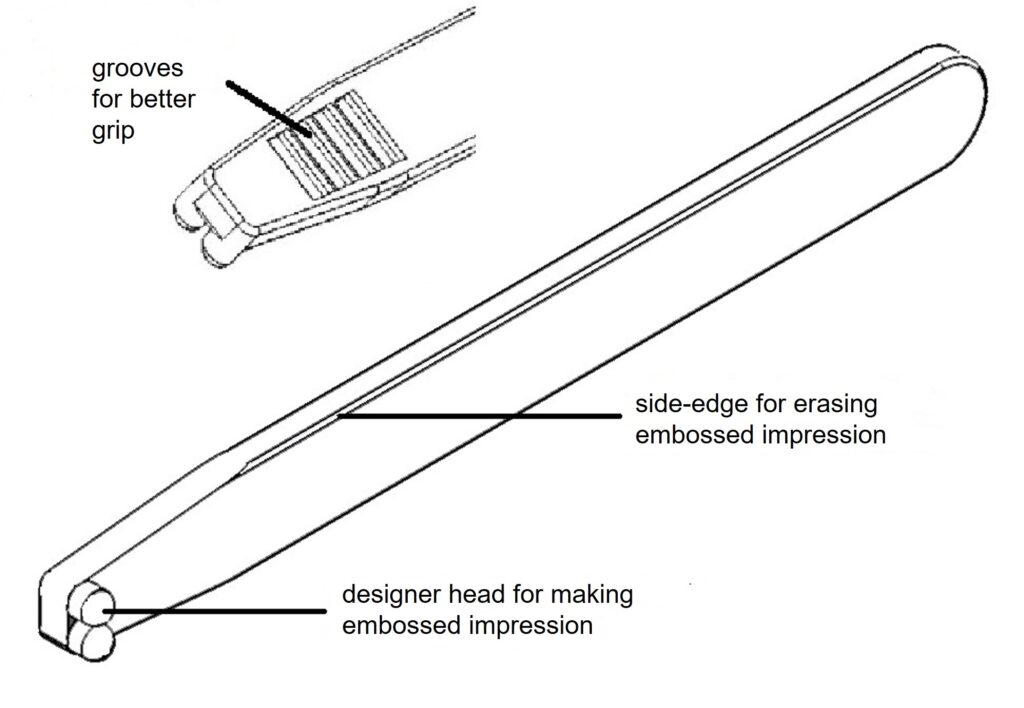
 Stylus
- The Stylus is specially designed to create an embossed impression on paper when traces over a Line Marker, Circle Marker, Arc Marker, or Set Square. User just needs to hold and use it similar to the way we hold and use a normal cutter.
- It has grooves on top surface for better grip.
- It’s side-edge can also be used to erase an embossed impression.
 Ruler
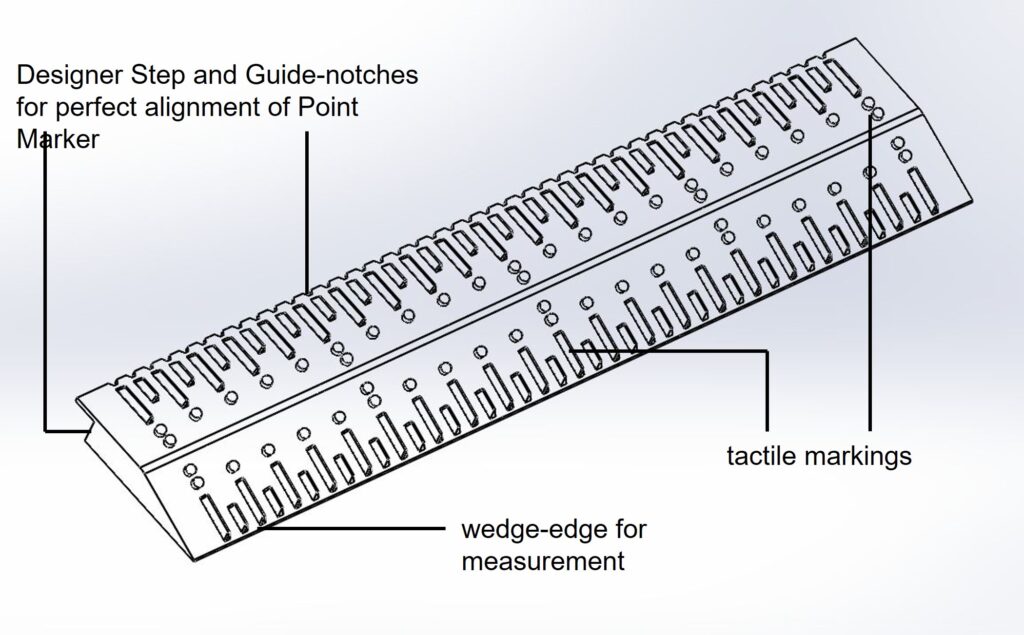
Ruler
- Ruler has Tactile markings at the standard 0.5cm resolutions for visually handicapped users.
- It has embedded magnets at the bottom for firm grip on the ‘Design Layout Plane’.
- On one side, it has specially designed Step and Guide-notches such that Point Marker can be perfectly aligned to the Tactile marking.
- The other side has wedge-edge to facilitate the measurement of length.
- Circle Markers and Arc Markers (of multiple radii) to draw Circles and Arc
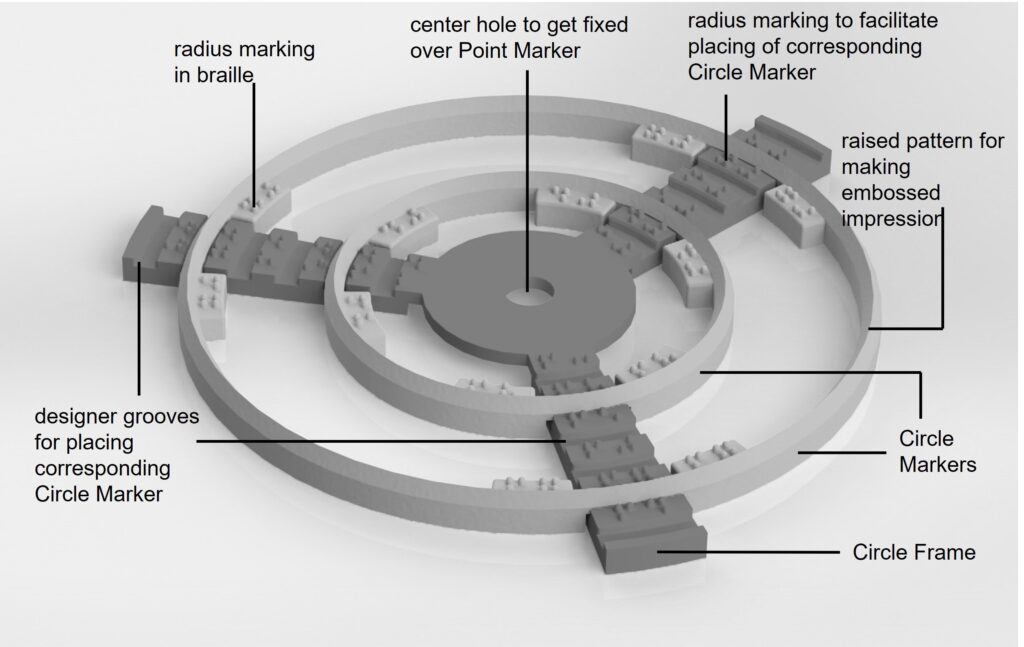
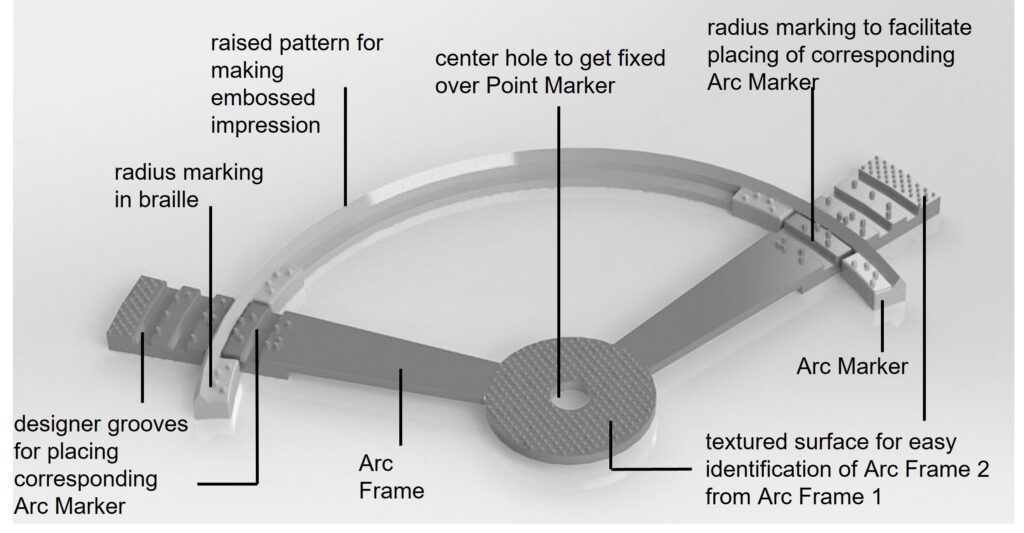
- Circle Markers and Arc Markers are like stencils for creating Circles and Arc of various radii – the substitutes for Compass. One can draw circles or arcs of radius 30, 35, 40, 45, 50, 55, 60, 65, 70, 75, and 80 mm using the Circle Markers, and of radius 85, 90, 95, 100, 105, 110, 115, and 120 mm using the Arc Markers. Each Circle Marker and Arc Marker have radius marking embossed in braille for visually handicapped users.
- Apart from these, there are 2 types of Circle Frames. Circle Frame 1 can house Circle Markers of radius 30, 40, 50, 60, 70, and 80 mm, while Circle Frame 2 can house Circle Markers of radius 35, 45, 55, 65, and 75 mm. Each Circle Frame has designer grooves with radius marking embossed in braille to facilitate placing the corresponding Circle Marker correctly.
- Similarly, there are 2 types of Arc Frames. Arc Frame 1 can house Arc Markers of radius 90, 100, 110, and 120 mm, while Arc Frame 2 can house Arc Markers of radius 85, 95, 105, and 115 mm. Each Arc Frame also has designer grooves with radius marking embossed in braille to facilitate placing the corresponding Arc Marker correctly.
- The Circle Frames and Arc Frames have a center hole to fix over the Point Marker.
- All Circle Markers and Arc Markers have a raised pattern on the top to create embossed impression on paper when the Stylus traces over it.
- The Circle Frame 2 and Arc Frame 2 have textured surface at edge as well as around center to differentiate from Circle Frame 1 and Arc Frame 1.
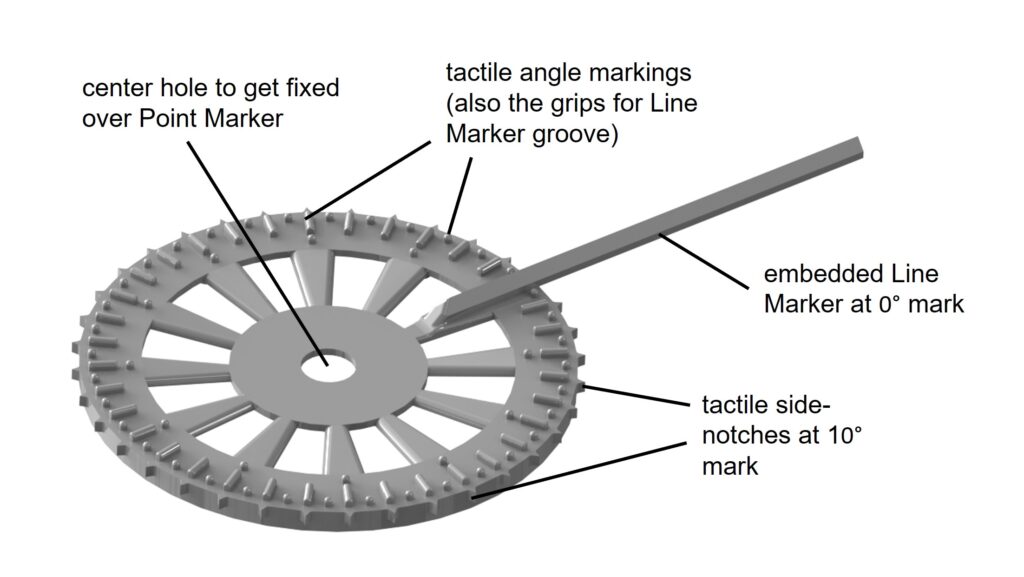
- Protractor
- It is a 360° Protractor with Tactile markings at standard 5° resolutions for visually handicapped users.
- Protractor has a center hole to fix over the Point Marker.
- It has a Line Marker fixed at 0° mark and provides a grip for the “15 cm Line Marker” at any desired Angle.
- It has embedded magnets at the bottom for firm grip on the ‘Design Layout Plane’.
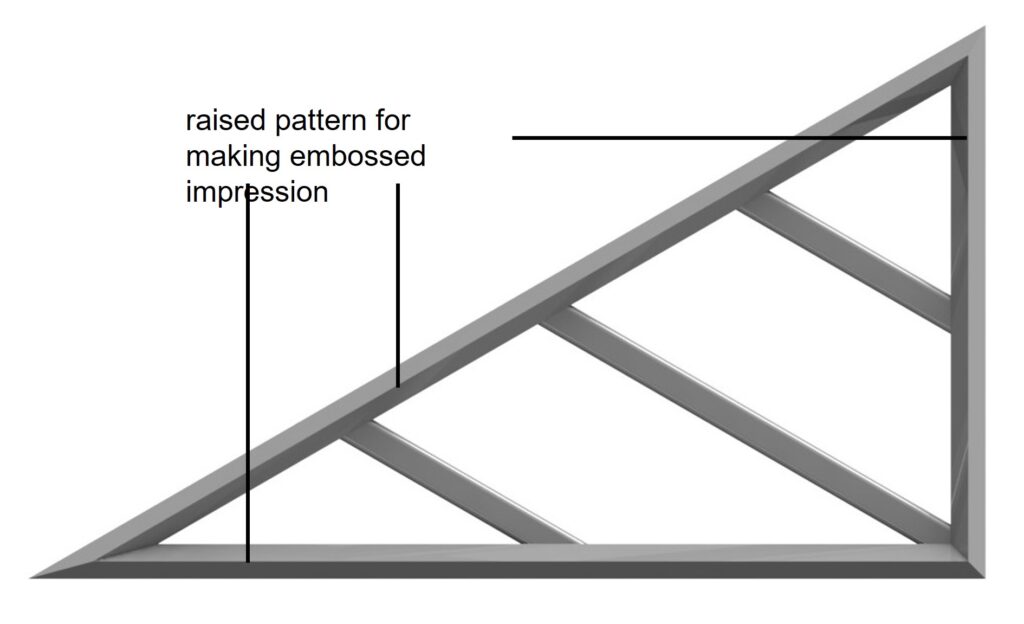
 Set Square
- useful in drawing 30°, 60°, and 90° angles quickly.
- has groove at the bottom to grip and slide over the Point Marker.
- has a raised pattern on the top to create embossed impression on paper when the Stylus traces over it.
GEOMKIT® – Instructions and Demo (YouTube) and the User Guide
GEOMKIT – The User Guide
GEOMKIT – Instructions and Demo
Basic Tutorial — https://www.youtube.com/watch?v=mEbpWKZmX1A
GEOMKIT #prototype version (was known as “Garg’s Tactile Geometry Kit for Blind and Visually Impaired students”)
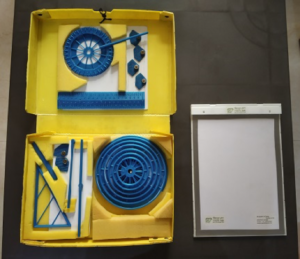
GEOMKIT #prototype version [1/3] – Components and Features
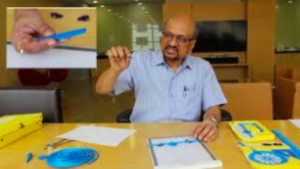
GEOMKIT #prototype version [2/3] – How to use…
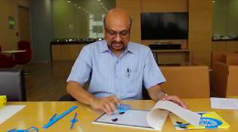
GEOMKIT #prototype version [3/3] – Live Demos
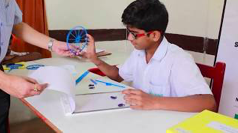
GEOMKIT – FAQ
How am I sure that the paper will not slide while I am drawing?
The clamp secures the paper with 2 punch pins as well. Once you punch the paper with the clamp, you can be sure the paper will not slide.
Why am I limited to resolution of 5mm, when the geometry set for sighted has 1mm resolution?
This is a standard set for tactile drawings for visually handicapped users. Actually, a tactile mark on Tactile Ruler has its own width and tactile marks made too close may not be differentiable by persons with visual disabilities. Moreover, tactile marks at 1mm would mean 5 marks within 5mm width – that may clutter the whole Ruler.
Moreover, the focus is on learning of concepts – therefore most of the educational material, even for sighted, asks for line drawings in multiple of 0.5cm.
Why am I limited to resolution of 5° on Protractor, when the geometry set for sighted has 1° resolution?
This is a standard set for tactile drawings for visually handicapped users. Actually, a tactile mark on Protractor has its own width and tactile marks made too close may not be differentiable by persons with visual disabilities. Moreover, tactile marks at 1° would mean 5 marks within 5° width – that may clutter the whole Protractor.
Moreover, the focus is on learning of concepts – therefore most of the educational materials, even for sighted, asks for angle drawings in multiple of 5°.
Why are there a limited set of Circle Markers and Arc Markers?
When the standard set for resolution in tactile drawings for visually handicapped users is 5mm, the focus of this Kit had been to allow the users to draw circles and arcs of radii multiple of 5mm. Moreover, it is found that drawing a circle of radius less than 30mm or greater than 120mm is too unmanageable for a small child – hence, the educational materials usually do not ask even sighted students to draw circles less than 30mm or greater than 120mm radius. Furthermore, a circle of diameter 170mm or more is difficult to fit on a regular page.
Therefore, we provide Circle Markers of radii 30mm, 35mm, 40mm, 45mm, 50mm, 55mm, 60mm, 65mm, 70mm, 75mm, and 80mm, and Arc Markers of radii 85mm, 90mm, 95mm, 100mm, 105mm, 110mm, 115mm, and 120mm.
What are the improvements in GEOMKIT over GEOMKIT #prototype?
Some of the major improvements are as below:
- Design of Circle Markers and Arc Markers are changed completely. GEOMKIT #prototype had provision for 5 Circle Markers and 6 Arc Markers covering radius from 30mm to 85mm, which was found limiting. GEOMKIT now has 11 Circle Markers and 8 Arc Markers covering radius from 30mm to 120mm. However, in order to accommodate 19 parts and to manage Arc Markers of size as large as 240mm diameter, the design has undergone major change.
- Ruler in GEOMKIT has a wedge-edge on the other side to facilitate measurement of length. Moreover, Ruler’s size is adjusted such that aligning it horizontally on the Slate is eased.
- Point Markers are made more robust, and Grooves are made on its top surface to provide better grip and maneuverability.
- Grooves are made on top surface of Stylus for better grip.
- Support grips are now coupled with the Line Markers at specified positions.
